
Town
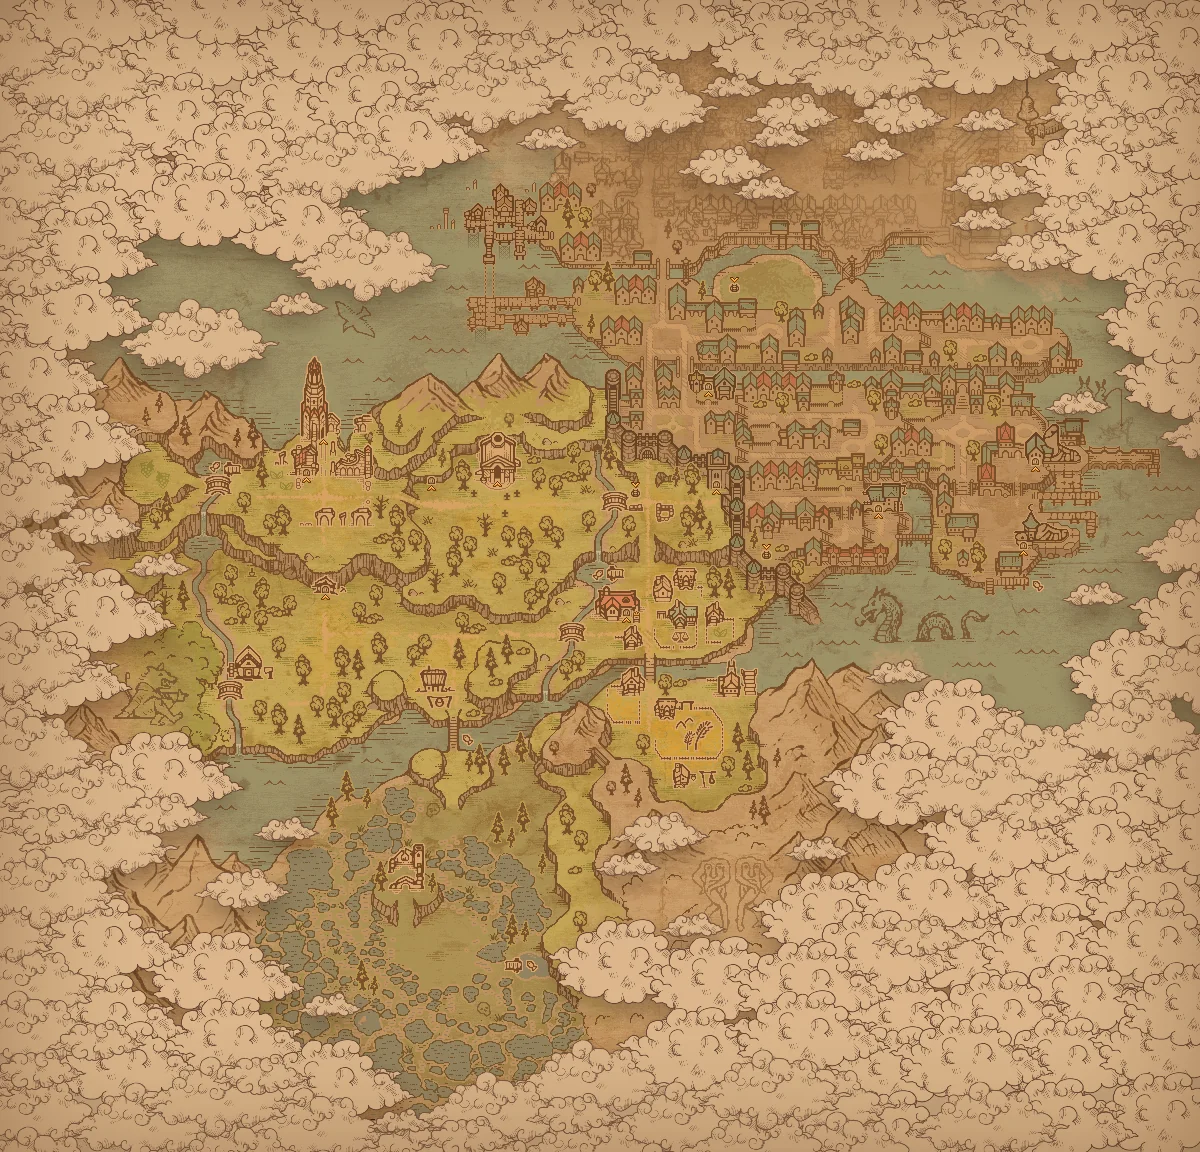
Rebuilding the Town happens plot by plot. Signboards are dotted around the streets, each marking either a ruined house you can repair or an empty lot where a shop can stand. Interact with one to see what it offers. Construction is instant, costing neither time nor energy, and materials can come from your backpack or from any shared chest in the same area.
You gain access to the town after crossing the port bridge, and more signboards appear as the story progresses.
Shops and houses
| Type | What it does |
|---|---|
| Shop | Brings a trader to town, in three tiers. Build tier I on an empty plot; for tiers II and III, speak to the trader and pick Upgrade. Each tier adds village reputation, a wider range or bigger stock, a higher weekly happiness allowance, and new town orders. Shops need either a house plot or a yard plot, depending on size. |
| House | A repair job that pays Green Scrolls, from 1 for the small house to 25 for a whole block; 180 across all the town’s houses. |
According to the game itself, “Town orders are the main source of” happiness. You collect orders from the chalk board in the Town Warehouse on Pride day. Every shop posts two per tier, and they’re filled with supply boxes packed in the Factory.
Town quality rises through Green Scrolls: give them to Linda under “New people” and each adds 1. Since town quality caps how much happiness you can hold, the houses are your main lever for bigger sermons. Linda accepts scrolls on Lust day only; on other days the “New people” option carries a day icon and is greyed out. The single exception is the first time, when completing her quest drops you straight into her offer regardless of day.

 Shops on house plots 8
 Alchemist
The Alchemist stocks potions, treatments for corpses and zombies, and writing supplies. It sits on a house plot and, level with the Jeweler, is the costliest shop: Building Kit I ×8, Wooden Kit I ×6 and Iron Kit I ×3.
| Category | Stock |
|---|---|
| Alchemy | Battle potions (Healing, damage, berserker, zombie), growth elixirs, Preservative, Reanimation Liquid, and the corpse and zombie solutions and injections. A stronger grade appears with every tier; tier III adds the Philosopher Stone for 50 silver |
| Writing | Tier I: Leather Scroll, Clean Paper, Ink, Science Kit I. Tier II: Blank Softcover Notebook, Science Kit II. Tier III: Blank Hardcover Notebook |
Its happiness list is longer than its cap: the full list tops out at 12, 22 and 34 per week while the caps are 8, 16 and 25, so you only need to sell whatever comes easiest. At tier III, one each per week of Tannin Liquid, Alkali, Umami and the Philosopher Stone pays 2 happiness apiece, the highest single-item value here.
| Tier | Materials | Reputation | Town quality | Daily income | Weekly happiness cap |
|---|---|---|---|---|---|
| I | 8× Building Kit I, 6× Building Kit I, 6× Wooden Kit I, 3× Wooden Kit I, 3× Iron Kit I Iron Kit I | 2 | — | 20 | 8 |
| II | 10× Furniture Kit I, 4× Furniture Kit I, 4× Sculpture Kit II, 4× Sculpture Kit II, 4× Blank Softcover Notebook Blank Softcover Notebook | 2 | — | 50 | 16 |
| III | 10× Furniture Kit II, 4× Furniture Kit II, 4× Building Kit II, 4× Building Kit II, 4× Blank Hardcover Notebook Blank Hardcover Notebook | 3 | — | 100 | 25 |
When you build it, each of these has a chance to come back: Building Kit I (1–4), Wooden Kit I (1–3), Iron Kit I (1).
Sells (stock at each tier)

 Dream Dust
 Paint
Paint Lacquer
 Healing Potion
 Damage Potion
 Zombie Motivator Potion
 Berserker Potion
 Weak growth elixir
 Preservative
 Reanimation Liquid
 Solution for Corpses★
 Solution for Zombies★
 Injection for Corpses★
 Injection for Zombies★
 Leather Scroll
 Clean Paper
 Ink
Ink Science Kit I
 Paper glop
 Healing Potion II
 Damage Potion II
 Zombie Motivator Potion II
 Berserker Potion II
 Rich growth elixir
 Organ Improver
 Organ Improver
 Spices
 Third Eye SaltSolution for Corpses★★Solution for Zombies★★Injection for Corpses★★Injection for Zombies★★Blank Softcover Notebook
 Science Kit II
 Healing Potion III
 Damage Potion III
 Zombie Motivator Potion III
 Berserker Potion III
 Miracle growth elixir
 Tannin Liquid
 Alkali
 Umami
Umami Philosopher StoneSolution for Corpses★★★Solution for Zombies★★★Injection for Corpses★★★Injection for Zombies★★★Blank Hardcover Notebook
Happiness from sales (each item / most counted per week, by tier)
| Item | I | II | III |
|---|---|---|---|
| Dream Dust | 0.5 / 4 | 0.5 / 4 | 0.5 / 4 |
| Paint | 0.667 / 3 | 0.667 / 3 | 0.667 / 3 |
| Lacquer | 0.667 / 3 | 0.667 / 3 | 0.667 / 3 |
| Weak growth elixir | 0.667 / 3 | 0.667 / 3 | 0.667 / 3 |
| Clean Paper | 0.1 / 20 | 0.1 / 20 | 0.1 / 20 |
| Ink | 0.2 / 10 | 0.2 / 10 | 0.2 / 10 |
| Rich growth elixir | — | 1 / 2 | 1 / 2 |
| Organ Improver | — | 1 / 2 | 1 / 2 |
| Organ Improver | — | 1 / 2 | 1 / 2 |
| Spices | — | 1 / 2 | 1 / 2 |
| Blank Softcover Notebook | — | 0.2 / 10 | 0.2 / 10 |
| Miracle growth elixir | — | — | 2 / 1 |
| Tannin Liquid | — | — | 2 / 1 |
| Alkali | — | — | 2 / 1 |
| Umami | — | — | 2 / 1 |
| Philosopher Stone | — | — | 2 / 1 |
| Blank Hardcover Notebook | — | — | 0.4 / 5 |
 Supply: Kitchen Utensils for 20 (Happy supplier+5) happiness, urgentSupply: Kitchen Utensils for 15 (Happy supplier+5) happiness
 Supply: Engineering Mechanism for 40 (Happy supplier+10) happiness, urgentSupply: Engineering Mechanism for 25 (Happy supplier+5) happiness
 Supply: Appliances II for 50 (Happy supplier+10) happiness, urgentSupply: Appliances II for 25 (Happy supplier+5) happiness
Notes
- Upgrades use notebooks the shop can’t yet sell. Tier II takes 4 Blank Softcover Notebooks, on sale here only after the upgrade, so write them at a Writing Desk. Tier III takes 4 Blank Hardcover Notebooks, which come from a Printing Press (or from this shop once it’s reached tier III).
- Paper and ink have no other seller. Otherwise you’ll be making them at the Writing Desk.
- Unconfirmed: Berserker Potion III has a usual stock of zero on the tier III list, and the price formula turns that into a 1-copper sale price.
 Apothecary
The Apothecary supplies the alchemist and the church. It goes on a house plot and ranks among the cheapest shops: Building Kit I ×4, Wooden Kit I ×3 and Iron Kit I ×1.
Nowhere else in the game sells alchemic powders, and no recipe produces them. Tier I carries the nine powders with one or two runes; tier II adds the ten with three, so from then on the full set is available, 20 of each, priced from 5 to 30 copper. Other stock: church candles and incense, Alchemy Flasks I, Salt, Ash, and Alcohol from tier II.
Happiness goods are Fragrance, Alchemy Flasks, Salt and incense, with Alcohol and candles joining later. At each tier, selling every one up to its weekly limit lands exactly on the cap: 8, 16, 25.
| Tier | Materials | Reputation | Town quality | Daily income | Weekly happiness cap |
|---|---|---|---|---|---|
| I | 4×Building Kit I, 3×Wooden Kit I, 1×Iron Kit I | 2 | — | 20 | 8 |
| II | 4×Furniture Kit I, 1× Sculpture Kit I, 2× Sculpture Kit I, 2× Glass Containers Glass Containers | 2 | — | 50 | 16 |
| III | 4×Furniture Kit II, 3×Building Kit II, 1×Sculpture Kit II | 3 | — | 100 | 25 |
When you build it, each of these has a chance to come back: Building Kit I (1–2), Wooden Kit I (1).
Sells (stock at each tier)
| Item | I | II | III |
|---|---|---|---|
 Alchemic Powder Alchemic Powder  | 20 | 20 | 20 |
 Alchemic Powder Alchemic Powder | 20 | 20 | 20 |
 Alchemic Powder Alchemic Powder  | 20 | 20 | 20 |
 Alchemic Powder Alchemic Powder | 20 | 20 | 20 |
 Alchemic Powder Alchemic Powder  | 20 | 20 | 20 |
 Alchemic Powder Alchemic Powder | 20 | 20 | 20 |
 Alchemic Powder Alchemic Powder | 20 | 20 | 20 |
 Alchemic Powder Alchemic Powder | 20 | 20 | 20 |
 Alchemic Powder Alchemic Powder | 20 | 20 | 20 |
 Melted Fat Melted Fat | 20 | 20 | 20 |
 Fragrance Fragrance | 20 | 20 | 20 |
 Alchemy Flasks I Alchemy Flasks I | 20 | 20 | 20 |
 Simple Candle Simple Candle | 10 | 10 | 10 |
 Simple Incense Simple Incense | 10 | 10 | 10 |
 Comet's Tail Comet's Tail | 10 | 10 | 10 |
 Ash Ash | 20 | 20 | 20 |
 Salt Salt | 20 | 20 | 20 |
 Alchemist's bag Alchemist's bag | 1 | 1 | 1 |
 Alchemic Powder Alchemic Powder | — | 20 | 20 |
 Alchemic Powder Alchemic Powder | — | 20 | 20 |
 Alchemic Powder Alchemic Powder | — | 20 | 20 |
 Alchemic Powder Alchemic Powder | — | 20 | 20 |
 Alchemic Powder Alchemic Powder | — | 20 | 20 |
 Alchemic Powder Alchemic Powder | — | 20 | 20 |
 Alchemic Powder Alchemic Powder | — | 20 | 20 |
 Alchemic Powder Alchemic Powder | — | 20 | 20 |
 Alchemic Powder Alchemic Powder | — | 20 | 20 |
 Alchemic Powder Alchemic Powder | — | 20 | 20 |
 Alcohol Alcohol | — | 20 | 20 |
 Pretty Candle Pretty Candle | — | 10 | 10 |
 Alchemy Flasks II Alchemy Flasks II | — | — | 20 |
 Magnificent Candle Magnificent Candle | — | — | 10 |
 Fancy Incense Fancy Incense | — | — | 10 |
Alchemic Powder Alchemic Powder Alchemic Powder Alchemic Powder Alchemic Powder Alchemic Powder Alchemic Powder Alchemic Powder Alchemic Powder Melted FatFragranceAlchemy Flasks ISimple CandleSimple IncenseComet's TailAshSaltAlchemic Powder Alchemic Powder Alchemic Powder Alchemic Powder Alchemic Powder Alchemic Powder Alchemic Powder Alchemic Powder Alchemic Powder Alchemic Powder AlcoholPretty CandleAlchemy Flasks IIMagnificent CandleFancy IncenseHappiness from sales (each item / most counted per week, by tier)
| Item | I | II | III |
|---|---|---|---|
| Fragrance | 0.2 / 10 | 0.2 / 10 | 0.2 / 10 |
| Alchemy Flasks I | 0.2 / 10 | 0.2 / 10 | 0.2 / 10 |
| Salt | 0.5 / 4 | 0.25 / 8 | 0.25 / 8 |
| Simple Incense | 0.5 / 4 | 0.25 / 8 | 0.25 / 8 |
| Alcohol | — | 0.267 / 15 | 0.267 / 15 |
| Pretty Candle | — | 0.5 / 8 | 0.5 / 8 |
| Alchemy Flasks II | — | — | 0.2 / 10 |
| Magnificent Candle | — | — | 0.5 / 8 |
| Fancy Incense | — | — | 0.375 / 8 |
 Supply: Cutlery I for 25 (Happy supplier+5) happiness, urgentSupply: Cutlery I for 15 (Happy supplier+5) happinessSupply: Kitchen Utensils for 40 (Happy supplier+10) happiness, urgentSupply: Kitchen Utensils for 25 (Happy supplier+5) happiness, urgent
 Supply: Cutlery II for 50 (Happy supplier+10) happiness, urgentSupply: Cutlery II for 30 (Happy supplier+5) happiness
Notes
- Both tier II orders are marked urgent. Each wants the same 20 Supply: Kitchen Utensils, one paying 40 happiness and the other 25. Everywhere else, including this shop’s other tiers, the cheaper order is the cumulative one, so this is probably a data mistake that could be fixed.
- Powders have a single source. Many alchemy mixes use them, and this stall is it.
 Baker
Baker
The Baker is the town shop for bread and baking ingredients. Build it on a house plot for Building Kit I ×6, Wooden Kit I ×4 and Iron Kit I ×2.
| Goods | Sells | Buys |
|---|---|---|
| Baked goods: Bread, Berry Pie, muffins, croissants | Yes | No |
| Ingredients: Dough, Flour, eggs, Salt | Yes | Yes |
| Food bag (5 silver) | Yes | No |
Tier II brings milk, Flesh and spices; tier III doubles every stock level.
| Tier | Materials | Reputation | Town quality | Daily income | Weekly happiness cap |
|---|---|---|---|---|---|
| I | 6×Building Kit I, 4×Wooden Kit I, 2×Iron Kit I | 2 | — | 20 | 8 |
| II | 6×Furniture Kit I, 2×Sculpture Kit I, 4× Flesh Flesh | 2 | — | 50 | 16 |
| III | 6×Furniture Kit II, 4×Building Kit II, 8×Flesh | 3 | — | 100 | 25 |
When you build it, each of these has a chance to come back: Building Kit I (1–3), Wooden Kit I (1–2), Iron Kit I (1).
Sells (stock at each tier)
| Item | I | II | III |
|---|---|---|---|
 Bread Bread | 10 | 20 | 40 |
 Dough Dough | 15 | 30 | 60 |
 Flour Flour | 20 | 40 | 80 |
 Berry Pie Berry Pie | 5 | 10 | 20 |
 Muffin Muffin | 5 | 10 | 20 |
 Croissant Croissant | 5 | 10 | 20 |
 Chicken Egg Chicken Egg | 10 | 20 | 40 |
| Salt | 20 | 40 | 80 |
 Food bag Food bag | 1 | 1 | 1 |
 Jug of Milk Jug of Milk | — | 10 | 20 |
| Flesh | — | 10 | 20 |
 Spices Spices | — | 10 | 20 |
Happiness from sales (each item / most counted per week, by tier)
 Supply: Flour Sack for 20 (Happy supplier+5) happiness, urgentSupply: Flour Sack for 15 (Happy supplier+5) happiness
 Supply: Iron Tools for 40 (Happy supplier+10) happiness, urgentSupply: Iron Tools for 25 (Happy supplier+5) happiness
 Supply: Appliances I for 50 (Happy supplier+10) happiness, urgentSupply: Appliances I for 25 (Happy supplier+5) happiness
Notes
- Its happiness cap is out of reach. Only Fabric, Flour and, from tier II, Flesh earn happiness here, topping out at 2, 6 and 12 per week against caps of 8, 16 and 25.
- Upgrades cost Flesh: 4 for tier II, 8 for tier III. You’ll get it from corpses, since the Baker only stocks it from tier II. No other trader buys Flesh.
- Fabric is bought, never sold, and it pays happiness. For Fabric to buy, go to the Tailor at tier III.
 Fish Stand
The Fish Stand buys fish and sells fishing gear from a house plot. It costs Building Kit I ×6, Wooden Kit I ×4 and Iron Kit I ×2.
No other trader buys whole fish. Fish are fixed-price here, so you always get the full base price no matter how many you sell, ranging from 10 copper for a Roach up to 1 silver 92 for an Eel. Tier I accepts ten species; tier II adds eight more, including Pike, Trout and Eel. Where each bites is on Fishing.
| Tier | Rod for sale | Price |
|---|---|---|
| I | Amateur Rod | 1 silver |
| II | Advanced Rod | 5 silver |
| III | Pro Rod | 100 silver |
Rods are fixed-price and can’t be sold back.
| Tier | Materials | Reputation | Town quality | Daily income | Weekly happiness cap |
|---|---|---|---|---|---|
| I | 6×Building Kit I, 4×Wooden Kit I, 2×Iron Kit I | 2 | — | 20 | 8 |
| II | 6×Furniture Kit I, 2×Sculpture Kit I, 1× Advanced Rod Advanced Rod | 2 | — | 50 | 16 |
| III | 6×Furniture Kit II, 4×Building Kit II, 1× Pro Rod Pro Rod | 3 | — | 100 | 25 |
When you build it, each of these has a chance to come back: Building Kit I (1–3), Wooden Kit I (1–2), Iron Kit I (1).
Sells (stock at each tier)
| Item | I | II | III |
|---|---|---|---|
 Amateur Rod Amateur Rod | 1 | 1 | 1 |
 Fisherman's bag Fisherman's bag | 1 | 1 | 1 |
| Advanced Rod | — | 1 | 1 |
| Pro Rod | — | — | 1 |


Happiness from sales (each item / most counted per week, by tier)
| Item | I | II | III |
|---|---|---|---|
 Breadcrumb Bait Breadcrumb Bait | 0.1 / 20 | 0.05 / 40 | 0.05 / 40 |
 Insect Bait Insect Bait | — | 0.1 / 40 | 0.1 / 60 |
 Live Bait Live Bait | — | — | 0.2 / 40 |
 Supply: Preserves I for 20 (Happy supplier+5) happiness, urgentSupply: Preserves I for 15 (Happy supplier+5) happinessSupply: Iron Tools for 40 (Happy supplier+10) happiness, urgentSupply: Iron Tools for 25 (Happy supplier+5) happiness
 Supply: Clothes I for 50 (Happy supplier+10) happiness, urgentSupply: Clothes I for 25 (Happy supplier+5) happiness
Notes
- The bait on display isn’t for sale. Breadcrumb, insect and live bait are listed with stock but flagged not-for-sale; the stand only buys them, for happiness.
- The weekly happiness cap is unreachable. Bait is its only happiness good, worth at most 2, 6 and 16 a week versus caps of 8, 16 and 25.
- Upgrades require rods: an Advanced Rod for tier II, a Pro Rod for tier III. The stand only stocks each from the tier it unlocks, so craft them at a Woodworking Workbench II.
 Furniture Maker
The Furniture Maker sells woodworking parts and building kits from a house plot. Construction takes Building Kit I ×6, Wooden Kit I ×4 and Iron Kit I ×2.
It’s the sole seller of three kits that most town upgrades depend on:
| Kit | From tier |
|---|---|
| Wooden Kit I | I |
| Furniture Kit I | II |
| Furniture Kit II | III |
It also stocks Bronze Nails, planks, bronze and iron details and Polished Bronze, later adding Wooden Joints and Steel Screws. Wooden Trinkets are bought but never sold.
Nearly its whole range pays a trickle of happiness. At tier I, for instance, a Bronze Nail is worth 0.01 with 100 counted per week, and Polished Bronze 0.1. Selling every listed good up to its weekly count reaches the cap exactly: 8, 16, 25.
| Tier | Materials | Reputation | Town quality | Daily income | Weekly happiness cap |
|---|---|---|---|---|---|
| I | 6×Building Kit I, 4×Wooden Kit I, 2×Iron Kit I | 2 | — | 20 | 8 |
| II | 6×Furniture Kit I, 2×Sculpture Kit I, 4× Wooden beam Wooden beam | 2 | — | 50 | 16 |
| III | 6×Furniture Kit II, 4×Building Kit II, 12× Steel Screws Steel Screws | 3 | — | 100 | 25 |
When you build it, each of these has a chance to come back: Building Kit I (1–3), Wooden Kit I (1–2), Iron Kit I (1).
Sells (stock at each tier)
| Item | I | II | III |
|---|---|---|---|
 Bronze Nails Bronze Nails | 50 | 75 | 150 |
| Wooden Kit I | 20 | 30 | 60 |
 Wooden Plank Wooden Plank | 30 | 45 | 90 |
 Oiled Plank Oiled Plank | 15 | 25 | 50 |
 Bronze Detail Bronze Detail | 25 | 40 | 80 |
 Polished Bronze Polished Bronze | 10 | 20 | 40 |
 Builder's bag Builder's bag | 1 | 1 | 1 |
 Iron Nails Iron Nails | — | 50 | 100 |
 Iron Detail Iron Detail | — | 20 | 40 |
| Furniture Kit I | — | 30 | 60 |
| Wooden beam | — | — | 40 |
 Wooden Joint Wooden Joint | — | — | 20 |
| Furniture Kit II | — | — | 30 |
| Steel Screws | — | — | 50 |

Happiness from sales (each item / most counted per week, by tier)
| Item | I | II | III |
|---|---|---|---|
| Bronze Nails | 0.01 / 100 | 0.007 / 150 | 0.007 / 150 |
| Wooden Kit I | 0.017 / 60 | 0.017 / 60 | 0.017 / 60 |
| Oiled Plank | 0.033 / 30 | 0.02 / 50 | 0.02 / 50 |
| Wooden Plank | 0.017 / 60 | 0.011 / 90 | 0.011 / 90 |
| Bronze Detail | 0.04 / 50 | 0.025 / 80 | 0.025 / 80 |
| Polished Bronze | 0.1 / 20 | 0.05 / 40 | 0.05 / 40 |
| Iron Nails | — | 0.02 / 100 | 0.02 / 100 |
| Iron Detail | — | 0.05 / 40 | 0.05 / 40 |
| Furniture Kit I | — | 0.033 / 60 | 0.033 / 60 |
| Wooden beam | — | 0.05 / 40 | 0.05 / 40 |
| Wooden Joint | — | — | 0.15 / 20 |
| Furniture Kit II | — | — | 0.1 / 30 |
| Steel Screws | — | — | 0.06 / 50 |
 Supply: Furniture I for 25 (Happy supplier+10) happiness, urgentSupply: Furniture I for 15 (Happy supplier+5) happiness
 Supply: Furniture II for 40 (Happy supplier+10) happiness, urgentSupply: Furniture II for 25 (Happy supplier+5) happinessSupply: Appliances I for 50 (Happy supplier+10) happiness, urgentSupply: Appliances I for 25 (Happy supplier+5) happiness
Notes
- Wooden Trinkets are refused at tier II. They’re on the buy list at tiers I and III but absent from tier II’s.
- Unconfirmed: a few goods have a normal stock of 0: Wooden beam at tier II, Lacquer and Paint at tier III. The price formula then pays 1 copper each. Wooden beams do count for happiness at tier II, so a few may still be worth selling.
- Tier II’s upgrade needs 4 Wooden beams, which the shop doesn’t sell until tier III; cut them on a Circular Saw.
 Jeweler
The Jeweler is where you buy zombie collars, bronze goods, talismans and tool sets. It needs a house plot and, tied with the Alchemist, costs the most of any shop: Building Kit I ×8, Wooden Kit I ×6 and Iron Kit I ×3.
Zombie collars are sold here and nowhere else:
| Collar | From tier | Price |
|---|---|---|
| Bronze Zombie Collar | I | 1 silver |
| Golden | II | 10 silver |
| Steel | III | 90 silver |
Other stock includes Polished Bronze, Bronze Scrap, and a talisman and tool set per tier; from tier II there are also bronze gears, Golden ingots and Keys for Looters. Two valuables are bought but never resold: Precious Trinkets at 105 silver and Fine Jewelry at 500.
| Tier | Materials | Reputation | Town quality | Daily income | Weekly happiness cap |
|---|---|---|---|---|---|
| I | 8×Building Kit I, 6×Wooden Kit I, 3×Iron Kit I | 2 | — | 20 | 8 |
| II | 10×Furniture Kit I, 4×Sculpture Kit II, 5×Polished Bronze | 2 | — | 50 | 16 |
| III | 10×Furniture Kit II, 4×Building Kit II, 10×Polished Bronze | 3 | — | 100 | 25 |
When you build it, each of these has a chance to come back: Building Kit I (1–4), Wooden Kit I (1–3), Iron Kit I (1).
Sells (stock at each tier)
| Item | I | II | III |
|---|---|---|---|
| Polished Bronze | 20 | 40 | 50 |
 Bronze Zombie Collar Bronze Zombie Collar | 1 | 3 | 5 |
 Bronze Scrap Bronze Scrap | 15 | 20 | 30 |
 Bronze Talisman Bronze Talisman | 1 | 1 | 1 |
 Bronze tools Bronze tools | 1 | 1 | 1 |
 Tool bag Tool bag | 1 | 1 | 1 |
 Bronze Gear Bronze Gear | — | 10 | 20 |
 Golden Zombie Collar Golden Zombie Collar | — | 1 | 3 |
 Keys for Looters Keys for Looters | — | 3 | 10 |
 Golden ingot Golden ingot | — | 5 | 10 |
 Silver Talisman Silver Talisman | — | 1 | 1 |
 Iron tools Iron tools | — | 1 | 1 |
 Steel Zombie Collar Steel Zombie Collar | — | — | 1 |
 Golden Talisman Golden Talisman | — | — | 1 |
 Steel tools Steel tools | — | — | 1 |


Happiness from sales (each item / most counted per week, by tier)
| Item | I | II | III |
|---|---|---|---|
| Polished Bronze | 0.05 / 40 | 0.05 / 80 | 0.05 / 80 |
| Bronze Scrap | 0.067 / 30 | 0.067 / 60 | 0.067 / 60 |
Supply: Iron Tools for 20 (Happy supplier+5) happiness, urgentSupply: Iron Tools for 15 (Happy supplier+5) happiness Supply: Steel Tools for 40 (Happy supplier+10) happiness, urgentSupply: Steel Tools for 25 (Happy supplier+5) happinessSupply: Engineering Mechanism for 50 (Happy supplier+10) happiness, urgentSupply: Engineering Mechanism for 25 (Happy supplier+5) happiness
Notes
- Its happiness cap can’t be reached. Polished Bronze and Bronze Scrap are its only happiness goods, maxing at 4, 8 and 8 per week against caps of 8, 16 and 25.
- Unconfirmed: from tier II it stocks several collars of each type. The code prices fixed-price goods at base price × stock, which could make the tier II price of a Bronze Zombie Collar read 3 silver instead of 1.
- Unconfirmed: the tier III list includes Fine Jewelry twice, and the earlier entry has a normal stock of 0. Since the game reads that one, the price formula would offer a mere 1 copper.
 Tailor
The Tailor trades in flax and cloth from a house plot, and it’s among the cheapest shops: Building Kit I ×4, Wooden Kit I ×3 and Iron Kit I ×1.
Tier I stocks Flax Seed, Flax and Lace; Flax Thread arrives at tier II and Fabric at tier III. It’s also the bag shop, with the Universal bag at 10 silver and, from tier II, the Big universal bag at 50.
| Tier | Happiness goods | Weekly limit |
|---|---|---|
| I | Flax only, 0.1 each | 80, enough on its own for the full cap of 8 |
| II | Flax Thread only, 0.1 each | 160, again the whole cap |
| III | Flax Thread and Fabric | Together they make up the cap of 25 |
| Tier | Materials | Reputation | Town quality | Daily income | Weekly happiness cap |
|---|---|---|---|---|---|
| I | 4×Building Kit I, 3×Wooden Kit I, 1×Iron Kit I | 2 | — | 20 | 8 |
| II | 4×Furniture Kit I, 1×Sculpture Kit I, 40× Flax Thread Flax Thread | 2 | — | 50 | 16 |
| III | 4×Furniture Kit II, 3×Building Kit II, 60× Fabric Fabric | 3 | — | 100 | 25 |
When you build it, each of these has a chance to come back: Building Kit I (1–2), Wooden Kit I (1).
Sells (stock at each tier)
| Item | I | II | III |
|---|---|---|---|
 Flax Seed Flax Seed | 20 | 40 | 100 |
 Flax Flax | 20 | 40 | 100 |
 Lace Lace | 20 | 20 | 20 |
 Universal bag Universal bag | 1 | 1 | 1 |
| Flax Thread | — | 40 | 80 |
 Big universal bag Big universal bag | — | 1 | 1 |
| Fabric | — | — | 30 |
Happiness from sales (each item / most counted per week, by tier)
| Item | I | II | III |
|---|---|---|---|
| Flax | 0.1 / 80 | — | — |
| Flax Thread | — | 0.1 / 160 | 0.075 / 160 |
| Fabric | — | — | 0.108 / 120 |
 Supply: Fabric for 25 (Happy supplier+10) happiness, urgentSupply: Fabric for 15 (Happy supplier+5) happinessSupply: Clothes I for 40 (Happy supplier+10) happiness, urgentSupply: Clothes I for 20 (Happy supplier+5) happiness
 Supply: Clothes II for 50 (Happy supplier+10) happiness, urgentSupply: Clothes II for 25 (Happy supplier+5) happiness
Notes
- Each upgrade wants what the next tier will sell. Tier II needs 40 Flax Thread, which the Tailor stocks only from tier II; tier III needs 60 Fabric, stocked only from tier III. Spin thread on a Spinning Wheel and weave fabric on a Weaving Loom.
- Orders can be packed by hand. The tier I Supply: Fabric can be boxed at a Woodworking Workbench as well as in the Factory, and tier II’s Supply: Clothes I at a Sewing Table.
- Flax loses its happiness value at tier II. If you’ve grown a lot of it, sell before upgrading.
 Vegetable Stand
The Vegetable Stand sells seeds, produce and garden tools from a house plot. It’s one of the cheapest shops to build: Building Kit I ×4, Wooden Kit I ×3 and Iron Kit I ×1.
| Tier | Adds |
|---|---|
| I | Both seed and crop of wheat, carrot, beet and cabbage; apples; seedlings for apple trees, bushes and rhododendrons |
| II | Onions, pumpkins, higher-grade cabbage, a blueberry seedling |
| III | Onions and pumpkins in every grade |
Onion and pumpkin seeds are sold here and nowhere else. Each tier also stocks one shovel, in order Bronze Shovel, Iron and finally Steel, the last at 145 silver.
Vegetables themselves are the happiness goods, each worth little but bought in bulk: the tier I cap of 8 is reached with 40 wheat plus 30 carrots, 20 beets and 20 cabbages. By tier III the list totals 48 against a cap of 25, and better grades pay more per item (0.2 for a gold-star pumpkin versus 0.04 for wheat).
| Tier | Materials | Reputation | Town quality | Daily income | Weekly happiness cap |
|---|---|---|---|---|---|
| I | 4×Building Kit I, 3×Wooden Kit I, 1×Iron Kit I | 2 | — | 20 | 8 |
| II | 4×Furniture Kit I, 2×Glass Containers, 40× Cabbage★★ Cabbage★★ | 2 | — | 50 | 16 |
| III | 4×Furniture Kit II, 3×Building Kit II, 40× Onion★★★ Onion★★★ | 3 | — | 100 | 25 |
When you build it, each of these has a chance to come back: Building Kit I (1–2), Wooden Kit I (1).
Sells (stock at each tier)
| Item | I | II | III |
|---|---|---|---|
 Wheat seed Wheat seed | 20 | 30 | 50 |
 Wheat Wheat | 20 | 30 | 50 |
 Carrot seed Carrot seed | 15 | 20 | 50 |
 Carrot Carrot | 15 | 20 | 50 |
 Beet Seed Beet Seed | 10 | 15 | 50 |
 Beet Beet | 10 | 15 | 50 |
 Cabbage seed★ Cabbage seed★ | 10 | 20 | 50 |
| Cabbage★ | 10 | 20 | 50 |
 Apple Apple | 15 | 25 | 40 |
 Bronze Shovel Bronze Shovel | 1 | 1 | 1 |
 Apple Tree Seedling Apple Tree Seedling | 2 | 4 | 8 |
 Bush Seedling Bush Seedling | 2 | 4 | 8 |
 Rhododendron Seedling Rhododendron Seedling | 2 | 4 | 8 |
 Farmer's bag Farmer's bag | 1 | 1 | 1 |
| Cabbage seed★★ | — | 20 | 40 |
| Cabbage seed★★★ | — | 15 | 30 |
| Cabbage★★ | — | 20 | 40 |
| Cabbage★★★ | — | 15 | 30 |
 Onion seed★ Onion seed★ | — | 15 | 40 |
| Onion seed★★ | — | 10 | 30 |
| Onion★ | — | 15 | 40 |
| Onion★★ | — | 10 | 30 |
 Pumpkin Seeds★ Pumpkin Seeds★ | — | 5 | 20 |
 Pumpkin★ Pumpkin★ | — | 5 | 20 |
 Blueberry Seedling Blueberry Seedling | — | 2 | 5 |
 Iron Shovel Iron Shovel | — | 1 | 1 |
| Onion seed★★★ | — | — | 20 |
| Onion★★★ | — | — | 20 |
| Pumpkin Seeds★★ | — | — | 15 |
| Pumpkin Seeds★★★ | — | — | 10 |
| Pumpkin★★ | — | — | 15 |
| Pumpkin★★★ | — | — | 10 |
 Steel Shovel Steel Shovel | — | — | 1 |
Wheat seedWheatCarrot seedCarrotBeet SeedBeetCabbage seed★Cabbage★AppleBronze ShovelApple Tree SeedlingBush SeedlingRhododendron SeedlingCabbage seed★★Cabbage seed★★★Cabbage★★Cabbage★★★Onion seed★Onion seed★★Onion★Onion★★Pumpkin Seeds★Pumpkin★Blueberry SeedlingIron ShovelOnion seed★★★Onion★★★Pumpkin Seeds★★Pumpkin Seeds★★★Pumpkin★★Pumpkin★★★Happiness from sales (each item / most counted per week, by tier)
| Item | I | II | III |
|---|---|---|---|
| Wheat | 0.05 / 40 | 0.033 / 60 | 0.04 / 100 |
| Carrot | 0.067 / 30 | 0.033 / 60 | 0.04 / 100 |
| Beet | 0.1 / 20 | 0.033 / 60 | 0.04 / 100 |
| Cabbage★ | 0.1 / 20 | 0.033 / 60 | 0.04 / 100 |
| Cabbage★★ | — | 0.044 / 45 | 0.05 / 80 |
| Cabbage★★★ | — | 0.044 / 45 | 0.067 / 60 |
| Onion★ | — | 0.044 / 45 | 0.05 / 80 |
| Onion★★ | — | 0.067 / 30 | 0.067 / 60 |
| Onion★★★ | — | — | 0.1 / 40 |
| Pumpkin★ | — | — | 0.1 / 40 |
| Pumpkin★★ | — | — | 0.133 / 30 |
| Pumpkin★★★ | — | — | 0.2 / 20 |
 Supply: Vegetables for 30 (Happy supplier+10) happiness, urgentSupply: Vegetables for 20 (Happy supplier+5) happinessSupply: Preserves I for 40 (Happy supplier+10) happiness, urgentSupply: Preserves I for 20 (Happy supplier+5) happiness
 Supply: Preserves II for 50 (Happy supplier+10) happiness, urgentSupply: Preserves II for 25 (Happy supplier+5) happiness
Shops on yard plots 5
 Brewery
The Brewery sells grapes, hops and finished drinks from a yard plot. Building it costs Building Kit I ×6, Wooden Kit I ×4 and Iron Kit I ×2.
On sale: Grape Seeds, Grapes, Hop Seeds, ciders, Mead and Beer, plus Wine from tier II, with better grades of grapes and wine at higher tiers. Grapes and wine can’t be bought anywhere else.
It also takes a brewer’s leftovers without ever selling them: Hops, Wheat, Apple Juice, Berry Juice and Empty Bottles, with Grape Juice joining at tier II. Those are its happiness goods, and the full list is worth more than the weekly cap allows (10 vs 8, 23 vs 16, 34 vs 25), so you can pick and choose.
| Tier | Materials | Reputation | Town quality | Daily income | Weekly happiness cap |
|---|---|---|---|---|---|
| I | 6×Building Kit I, 4×Wooden Kit I, 2×Iron Kit I | 2 | — | 20 | 8 |
| II | 10×Furniture Kit I, 6× Marble Kit, 20× Marble Kit, 20× Grape Juice★ Grape Juice★ | 3 | — | 50 | 16 |
| III | 12×Furniture Kit II, 6×Building Kit II, 20×Grape Juice★★★ | 3 | — | 100 | 25 |
When you build it, each of these has a chance to come back: Building Kit I (1–3), Wooden Kit I (1–2), Iron Kit I (1).
Sells (stock at each tier)
| Item | I | II | III |
|---|---|---|---|
 Grape Seeds★ Grape Seeds★ | 15 | 20 | 30 |
 Grapes★ Grapes★ | 15 | 20 | 30 |
 Hop Seeds Hop Seeds | 15 | 20 | 30 |
 Berry Cider Berry Cider | 10 | 15 | 20 |
 Apple Cider Apple Cider | 10 | 15 | 20 |
 Mead Mead | 10 | 15 | 20 |
 Beer Beer | 10 | 15 | 20 |
| Food bag | 1 | 1 | 1 |
| Grape Seeds★★ | — | 10 | 20 |
| Grapes★★ | — | 10 | 20 |
 Wine★ Wine★ | — | 10 | 20 |
| Grape Seeds★★★ | — | — | 15 |
| Grapes★★★ | — | — | 15 |
| Wine★★ | — | — | 15 |
| Wine★★★ | — | — | 10 |
Happiness from sales (each item / most counted per week, by tier)
| Item | I | II | III |
|---|---|---|---|
 Empty Bottle Empty Bottle | 0.05 / 40 | 0.05 / 80 | 0.05 / 120 |
 Apple Juice Apple Juice | 0.1 / 20 | 0.1 / 40 | 0.1 / 60 |
 Berry Juice Berry Juice | 0.1 / 20 | 0.1 / 40 | 0.1 / 60 |
 Hops Hops | 0.067 / 30 | 0.1 / 40 | 0.067 / 60 |
| Wheat | 0.05 / 40 | 0.05 / 60 | — |
| Grape Juice★ | — | 0.2 / 20 | 0.1 / 40 |
| Grape Juice★★ | — | — | 0.133 / 30 |
| Grape Juice★★★ | — | — | 0.2 / 20 |
Supply: Kitchen Utensils for 40 (Happy supplier+10) happiness, urgentSupply: Kitchen Utensils for 15 (Happy supplier+5) happinessSupply: Cutlery II for 70 (Happy supplier+20) happiness, urgentSupply: Cutlery II for 25 (Happy supplier+5) happinessSupply: Appliances II for 80 (Happy supplier+20) happiness, urgentSupply: Appliances II for 25 (Happy supplier+5) happinessNotes
- Upgrades cost Grape Juice, 20 of it each time, and gold-star Grape Juice for the tier III step. Since the Brewery never sells juice, you’ll be pressing it yourself on a Vine Press.
- Unconfirmed: wheat probably earns nothing at tier III, because its entry in the data is broken (id “wheat80”, count 0).
- Tier II’s urgent order is the most generous in the game: deliver 20 Supply: Cutlery II for 70 happiness (90 with Happy supplier).
- Tier II is worth 3 village reputation, one more than most shops.
 Builder
The Builder sells construction materials from a yard plot, and it’s among the cheapest shops to put up: Building Kit I ×4, Wooden Kit I ×3 and Iron Kit I ×1.
No other trader stocks Building Kit I (1 silver 50 each, tier I onward) or Building Kit II (tier II onward), the core material for every shop and house in town. Nails, boards, planks, stone and Bricks are on sale too, with beams and marble from tier II. At tier I it will buy Carved Stone and Stone Marbles while not selling either.
Its happiness list adds up exactly to each weekly cap (8, 16, 25) if you sell the full count of everything on it. Tier I wants Reinforced Planks and Polished Stone; by tier III the list includes 9 Building Kit II per week at a third of a point apiece.
| Tier | Materials | Reputation | Town quality | Daily income | Weekly happiness cap |
|---|---|---|---|---|---|
| I | 4×Building Kit I, 3×Wooden Kit I, 1×Iron Kit I | 2 | — | 20 | 8 |
| II | 6×Furniture Kit I, 4×Marble Kit, 2× Carved Stone Carved Stone | 2 | — | 50 | 16 |
| III | 8×Furniture Kit II, 4×Building Kit II, 4×Wooden Joint | 3 | — | 100 | 25 |
When you build it, each of these has a chance to come back: Building Kit I (1–2), Wooden Kit I (1).
Sells (stock at each tier)
| Item | I | II | III |
|---|---|---|---|
| Bronze Nails | 20 | 35 | 50 |
| Building Kit I | 20 | 30 | 30 |
 Board Board | 10 | 20 | 30 |
| Wooden Plank | 10 | 20 | 30 |
| Oiled Plank | 10 | 20 | 30 |
 Reinforced Plank Reinforced Plank | 10 | 20 | 30 |
 Piece of stone Piece of stone | 20 | 20 | 20 |
 Polished Stone Polished Stone | 20 | 20 | 20 |
| Carved Stone | — | 20 | 20 |
 Brick Brick | 20 | 30 | 40 |
| Builder's bag | 1 | 1 | 1 |
| Iron Nails | — | 25 | 50 |
| Building Kit II | — | 15 | 30 |
| Wooden beam | — | 10 | 20 |
 Oiled Beam Oiled Beam | — | 10 | 20 |
 Reinforced Beam Reinforced Beam | — | 10 | 20 |
 Marble Plate Marble Plate | — | 20 | 20 |
 Polished Marble Polished Marble | — | 20 | 20 |
 Carved Marble Carved Marble | — | — | 20 |
| Steel Screws | — | — | 50 |
| Wooden Joint | — | — | 20 |

Happiness from sales (each item / most counted per week, by tier)
| Item | I | II | III |
|---|---|---|---|
| Reinforced Plank | 0.2 / 20 | — | — |
| Polished Stone | 0.1 / 40 | — | — |
| Reinforced Beam | — | 0.2 / 40 | 0.15 / 40 |
| Carved Stone | — | 0.1 / 40 | — |
| Polished Marble | — | 0.1 / 40 | — |
| Carved Marble | — | — | 0.2 / 40 |
| Wooden Joint | — | — | 0.2 / 40 |
| Building Kit II | — | — | 0.333 / 9 |
Supply: Iron Tools for 20 (Happy supplier+5) happiness, urgentSupply: Iron Tools for 15 (Happy supplier+5) happinessSupply: Steel Tools for 40 (Happy supplier+10) happiness, urgentSupply: Steel Tools for 25 (Happy supplier+5) happinessSupply: Engineering Mechanism for 50 (Happy supplier+10) happiness, urgentSupply: Engineering Mechanism for 25 (Happy supplier+5) happinessNotes
- Put the Builder up early if you’re rebuilding the town. Tier I shops each need 4 to 8 Building Kit I and some houses up to 30, while the Builder normally stocks 20 at tier I and 30 at tier II. You can craft kits as well.
- Upgrade materials: tier II needs 2 Carved Stone, which the Builder buys but won’t sell until tier II, so carve it yourself on a Stonemason’s Workbench. Tier III needs 4 Wooden Joints, which it sells only from tier III.
 Pottery Workshop
Unlike the shops, the Pottery Workshop brings no trader to its yard plot; it adds town quality, 5 per tier across three tiers.
| Tier | Cost |
|---|---|
| I | 12 Boards, 8 Bronze Nails |
| II | 12 Wooden Planks, 8 Iron Details |
| III | 8 Wooden beams, 8 Advanced Details |
In the current files it seems half-finished: its trader entry is an empty placeholder, tiers II and III lack names in the game text, and it neither gives village reputation nor counts for the Shop Owner inspiration the way shops do.
| Tier | Materials | Reputation | Town quality | Daily income | Weekly happiness cap |
|---|---|---|---|---|---|
| I | 12×Board, 8×Bronze Nails | — | 5 | — | — |
| II | 12×Wooden Plank, 8×Iron Detail | — | 5 | — | — |
| III | 8×Wooden beam, 8× Advanced Detail Advanced Detail | — | 5 | — | — |
Notes
- Unconfirmed: each shop can be built only once, but no such limit appears for the Pottery Workshop. If that’s right, every spare yard plot could host one, worth 15 town quality apiece at tier III.
 Smithy
The Smithy handles metal, weapons and armour from a yard plot. It’s one of the cheapest shops to build: Building Kit I ×4, Wooden Kit I ×3 and Iron Kit I ×1.
| Tier | Metal goods | Gear |
|---|---|---|
| I | Bronze scrap, ingots, details, nails | Pike, sword, armour and hammer in bronze |
| II | Iron nails and details | The same set in iron |
| III | Steel details, screws, Engineering Details | The same set in steel |
Gear is fixed-price, running from 1 silver for the Light Pike to 250 silver for steel armour or a steel sword.
Rusty tools can be sold only here. The rusty axe, pickaxe, hammer, shovel, sword and armour go for 10 copper apiece, bronze tools for 1 silver 50 or more, and iron tools from tier II. Being fixed-price, they always fetch the full listed amount. It also buys Copper Trinkets.
| Tier | Materials | Reputation | Town quality | Daily income | Weekly happiness cap |
|---|---|---|---|---|---|
| I | 4×Building Kit I, 3×Wooden Kit I, 1×Iron Kit I | 2 | — | 20 | 8 |
| II | 6×Furniture Kit I, 4×Marble Kit, 6×Advanced Detail | 2 | — | 50 | 16 |
| III | 8×Furniture Kit II, 4×Building Kit II, 12×Steel Screws | 3 | — | 100 | 25 |
When you build it, each of these has a chance to come back: Building Kit I (1–2), Wooden Kit I (1).
Sells (stock at each tier)
| Item | I | II | III |
|---|---|---|---|
| Bronze Scrap | 10 | 15 | 20 |
 Bronze Ingot Bronze Ingot | 5 | 10 | 15 |
| Bronze Detail | 10 | 20 | 25 |
| Bronze Nails | 20 | 35 | 50 |
| Polished Bronze | 10 | 15 | 20 |
 Light Pike Light Pike | 1 | 1 | 1 |
 Bronze Armor Bronze Armor | 1 | 1 | 1 |
 Bronze Sword Bronze Sword | 1 | 1 | 1 |
 Bronze Hammer Bronze Hammer | 1 | 1 | 1 |
| Tool bag | 1 | 1 | 1 |
| Bronze Gear | — | 10 | 20 |
| Iron Nails | — | 30 | 50 |
| Iron Detail | — | 10 | 20 |
| Advanced Detail | — | 10 | 20 |
 Battle Pike Battle Pike | — | 1 | 1 |
 Iron Armor Iron Armor | — | 1 | 1 |
 Iron Sword Iron Sword | — | 1 | 1 |
 Iron Hammer Iron Hammer | — | 1 | 1 |
 Steel Detail Steel Detail | — | — | 30 |
| Steel Screws | — | — | 50 |
 Engineering Details Engineering Details | — | — | 20 |
 Knight's Spear Knight's Spear | — | — | 1 |
 Steel Armor Steel Armor | — | — | 1 |
 Steel Sword Steel Sword | — | — | 1 |
 Steel Hammer Steel Hammer | — | — | 1 |
Bronze ScrapBronze IngotBronze DetailBronze NailsPolished BronzeLight PikeBronze ArmorBronze SwordBronze Hammer Rusty Axe
 Rusty Pickaxe
 Rusty Hammer
 Rusty Shovel
 Rusty Sword
 Rusty Armor
 Bronze Axe
 Bronze PickaxeBronze Shovel
 Copper TrinketsBronze GearIron NailsIron DetailAdvanced DetailBattle PikeIron ArmorIron SwordIron Hammer
 Iron Axe
 Iron PickaxeIron ShovelSteel DetailSteel ScrewsEngineering DetailsKnight's SpearSteel ArmorSteel Sword
Happiness from sales (each item / most counted per week, by tier)
| Item | I | II | III |
|---|---|---|---|
| Bronze Scrap | 0.1 / 40 | 0.1 / 40 | 0.1 / 40 |
| Bronze Ingot | 0.2 / 20 | 0.2 / 20 | 0.2 / 20 |
| Iron Detail | — | 0.2 / 20 | 0.2 / 20 |
| Advanced Detail | — | 0.2 / 20 | 0.2 / 20 |
| Steel Screws | — | — | 0.04 / 100 |
| Engineering Details | — | — | 0.125 / 40 |
 Supply: Building materials I for 20 (Happy supplier+5) happiness, urgentSupply: Building materials I for 25 (Happy supplier+5) happiness
 Supply: Building materials II for 40 (Happy supplier+10) happiness, urgentSupply: Building materials II for 40 (Happy supplier+10) happinessSupply: Engineering Mechanism for 50 (Happy supplier+10) happiness, urgentSupply: Engineering Mechanism for 40 (Happy supplier+10) happiness
Notes
- Tier I’s cumulative order beats its urgent one. Both want Supply: Building materials I: 10 boxes before the deadline earns 20 happiness, but 10 boxes spread over any number of weeks earns 25. At tiers II and III they pay equally, so this is probably a data slip.
- The current tier’s hammer can’t be sold back.
- Upgrades call for the part the next tier stocks: 6 Advanced Details for tier II, 12 Steel Screws for tier III.
 Tavern
The Tavern is the town shop for drinks, soups and stories. It takes a yard plot and costs Building Kit I ×6, Wooden Kit I ×4 and Iron Kit I ×2.
| Goods | Sells | Buys |
|---|---|---|
| Beer, Berry Cider, Apple Cider, Blueberry Cider | Yes | Yes |
| Carrot, cabbage and vegetable soup; fish soup from tier II; soldier’s stew from tier III | Yes | No |
| Stories, higher grades at higher tiers | Yes | Yes |
It’s the one trader that handles Stories in either direction.
The four drinks are the happiness goods. Selling 40 of each per week fills the tier I cap of 8; at tier III it takes 100 of each.
| Tier | Materials | Reputation | Town quality | Daily income | Weekly happiness cap |
|---|---|---|---|---|---|
| I | 6×Building Kit I, 4×Wooden Kit I, 2×Iron Kit I | 2 | — | 20 | 8 |
| II | 10×Furniture Kit I, 6×Marble Kit, 20×Apple Cider | 3 | — | 50 | 16 |
| III | 12×Furniture Kit II, 6×Building Kit II, 20× Blueberry Cider Blueberry Cider | 3 | — | 100 | 25 |
When you build it, each of these has a chance to come back: Building Kit I (1–3), Wooden Kit I (1–2), Iron Kit I (1).
Sells (stock at each tier)
| Item | I | II | III |
|---|---|---|---|
 Story★ Story★ | 10 | 10 | 10 |
| Beer | 20 | 30 | 50 |
| Berry Cider | 20 | 30 | 50 |
| Apple Cider | 20 | 30 | 50 |
| Blueberry Cider | 20 | 30 | 50 |
 Carrot soup Carrot soup | 10 | 20 | 30 |
 Cabbage soup Cabbage soup | 10 | 20 | 30 |
 Vegetable soup Vegetable soup | 10 | 20 | 30 |
| Food bag | 1 | 1 | 1 |
| Story★★ | — | 10 | 10 |
 Fish soup Fish soup | — | 20 | 30 |
| Story★★★ | — | — | 10 |
 Soldier's stew Soldier's stew | — | — | 30 |
Happiness from sales (each item / most counted per week, by tier)
| Item | I | II | III |
|---|---|---|---|
| Beer | 0.05 / 40 | 0.067 / 60 | 0.06 / 100 |
| Berry Cider | 0.05 / 40 | 0.067 / 60 | 0.06 / 100 |
| Apple Cider | 0.05 / 40 | 0.067 / 60 | 0.06 / 100 |
| Blueberry Cider | 0.05 / 40 | 0.067 / 60 | 0.07 / 100 |
Supply: Preserves I for 20 (Happy supplier+5) happiness, urgentSupply: Preserves I for 15 (Happy supplier+5) happiness Supply: Beer for 40 (Happy supplier+10) happiness, urgentSupply: Beer for 25 (Happy supplier+5) happiness
 Supply: Wine for 50 (Happy supplier+10) happiness, urgentSupply: Wine for 25 (Happy supplier+5) happiness
Notes
- Its upgrades want its own cider: 20 Apple Cider for tier II, 20 Blueberry Cider for tier III. Tier I stocks 20 of each, but buying the lot pushes the price up; you can also brew cider in a Fermentation Barrel.
- Tier II is worth 3 village reputation, one more than most shops’ upgrades.
 House repairs 4
 Repair Small House
Repair Small House fixes up the town’s only small house, which stands in the “Break Through to the Port” battle area. No repair is cheaper: 4 Building Kit I, 3 Wooden Kit I and 1 Iron Kit I, matching the cheapest shop. You get one Green Scroll for it.
Finishing it earns the “Back to Life” achievement (“The town has taken its first steps toward recovery”); so does the neighbouring house in the same area (Repair House).
| Plot | Materials | Reputation | Town quality | Green scrolls |
|---|---|---|---|---|
| Break Through to the Port | 4×Building Kit I, 3×Wooden Kit I, 1×Iron Kit I | — | — | 1 |
When you build it, each of these has a chance to come back: Building Kit I (1–2), Wooden Kit I (1).
Notes
- House repairs earn no reputation. Most houses have a village reputation value in the data, but the game never reads it.
- Each repair, however small, advances Home Sweet Home.
 Repair House
Repair House restores one of three mid-sized town houses. All three pay 3 Green Scrolls, but the price depends on where the house stands:
| Location | Cost |
|---|---|
| “Break Through to the Port” area | 6 Building Kit I, 4 Wooden Kit I, 2 Iron Kit I |
| Eastern Districts | 20 Building Kit I, 10 Wooden Kit I, 6 Furniture Kit I |
| Central Districts | 30 Building Kit I, 10 Wooden Kit II, 4 Sculpture Kit II |
The port-side one also grants the “Back to Life” achievement.
| Plot | Materials | Reputation | Town quality | Green scrolls |
|---|---|---|---|---|
| Break Through to the Port | 6×Building Kit I, 4×Wooden Kit I, 2×Iron Kit I | — | — | 3 |
| Eastern Districts Purge | 20×Building Kit I, 10×Wooden Kit I, 6×Furniture Kit I | — | — | 3 |
| Central Districts Purge: Part II | 30×Building Kit I, 10× Wooden Kit II, 4×Sculpture Kit II Wooden Kit II, 4×Sculpture Kit II | — | — | 3 |
When you build it, each of these has a chance to come back: Building Kit I (1–3), Wooden Kit I (1–2), Iron Kit I (1).
Notes
- The two pricier houses are poor value. The Eastern Districts house costs the same as a Large House there, and the Central Districts one the same as the Large House beside it, yet they pay 3 scrolls where a Large House pays 10.
 Repair Large House
Repair Large House covers the town’s seven large houses, the repair you’ll do most often. Each pays 10 Green Scrolls, 70 across the set, and the price climbs the deeper into town you go:
| Houses | Cost each |
|---|---|
| Two near the port | 16 Building Kit I, 8 Wooden Kit I, 4 Iron Kit I |
| Eastern Districts and Market Square (four) | 20 Building Kit I, 10 Wooden Kit I, 6 Furniture Kit I |
| Central Districts (one) | 30 Building Kit I, 10 Wooden Kit II, 4 Sculpture Kit II |
| Plot | Materials | Reputation | Town quality | Green scrolls |
|---|---|---|---|---|
| Break Through to the Port | 16×Building Kit I, 8×Wooden Kit I, 4×Iron Kit I | — | — | 10 |
| Break Through to the Port | 16×Building Kit I, 8×Wooden Kit I, 4×Iron Kit I | — | — | 10 |
| Eastern Districts Purge | 20×Building Kit I, 10×Wooden Kit I, 6×Furniture Kit I | — | — | 10 |
| Eastern Districts Purge | 20×Building Kit I, 10×Wooden Kit I, 6×Furniture Kit I | — | — | 10 |
| Market Square Purge | 20×Building Kit I, 10×Wooden Kit I, 6×Furniture Kit I | — | — | 10 |
| Market Square Purge | 20×Building Kit I, 10×Wooden Kit I, 6×Furniture Kit I | — | — | 10 |
| Central Districts Purge: Part II | 30×Building Kit I, 10×Wooden Kit II, 4×Sculpture Kit II | — | — | 10 |
When you build it, each of these has a chance to come back: Building Kit I (1–8), Wooden Kit I (1–4), Iron Kit I (1–2).
Notes
- Start with the two by the port. At 28 tier-I kits for 10 scrolls, they’re the cheapest scrolls in town.
- The Builder perk can refund up to half the kits, rolled separately for each material.
 Repair Block
Repair Block rebuilds an entire block of houses, the biggest repair job in town. There’s one block in each of the four parts of town, each worth 25 Green Scrolls (100 total), and all cost the same: 16 Building Kit II, 10 Furniture Kit II and 5 Sculpture Kit II. That means waiting until tier II kits are within reach, whether crafted or bought.
| Plot | Materials | Reputation | Town quality | Green scrolls |
|---|---|---|---|---|
| Break Through to the Port | 16×Building Kit II, 10×Furniture Kit II, 5×Sculpture Kit II | — | — | 25 |
| — | 16×Building Kit II, 10×Furniture Kit II, 5×Sculpture Kit II | — | — | 20 |
| Eastern Districts Purge | 16×Building Kit II, 10×Furniture Kit II, 5×Sculpture Kit II | — | — | 25 |
| Market Square Purge | 16×Building Kit II, 10×Furniture Kit II, 5×Sculpture Kit II | — | — | 25 |
| Central Districts Purge: Part II | 16×Building Kit II, 10×Furniture Kit II, 5×Sculpture Kit II | — | — | 25 |
When you build it, each of these has a chance to come back: Building Kit II (1–8), Furniture Kit II (1–5), Sculpture Kit II (1–2).
Notes
- Over half the town’s Green Scrolls are in blocks: 100 of the 180 available from all houses combined.
- The town’s shops supply tier II kits: the Builder sells Building Kit II from tier II, the Furniture Maker sells Furniture Kit II from tier III. You can craft both too.
- A fifth block worth 20 scrolls exists in the data, but it has no signboard anywhere in the world and can’t be built.
Other 1
 Demolish the Wall
Demolish the Wall is how you get rid of the Factory’s two broken walls. One Dynamite per wall, and like all town construction it’s instant.
The effect is confined to the Factory: no Green Scrolls, and it isn’t treated as a house repair.

Notes
- Plots are in short supply. There are 7 house plots for 8 house-plot shops, and 4 yard plots for 5 yard-plot shops (the Pottery Workshop included). Every shop is single-build and nothing demolishes one, so one shop of each size always misses out. This is drawn from the game files and hasn’t been checked in play.
- A house repair alone raises neither town quality nor reputation. All it produces is Green Scrolls.
- Every shop is locked behind a technology. The story hands you Market Stalls I when you meet Linda at the port, covering the Apothecary, Vegetable Stand and Tailor; Market Stalls II and III and Artisans I and II must be bought for the rest. The Pottery Workshop has no technology.
- Construction can’t fail. There’s no mastery check and no energy cost; you just need the materials.